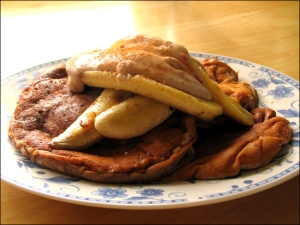
Posted by: heliamphora | 12 April, 2009

Some assembly required…

…gee, I do like to make things hard for myself sometimes.

It’s a long weekend (thank you, Easter! you don’t mean nothing to me, despite my non-religiosity – you mean four days off work!!) and I’ve been meaning to make this soup for two days. I finally got around to cooking the beans and barley… when the evening was almost upon me… but even though today was shopping day, I forgot to buy either canned tomatoes or, better still, a jar of tomato pasta sauce. So I’m having to make my own pasta sauce from scratch i.e. using fresh tomatoes for the five tablespoons of sauce that the soup requires. Queue the rolled eyes.

And since I’m a fuss-pot about tomatoes, I couldn’t help but score, blanch, peel, deseed, core and finely chop the tomatoes first. Really, who’d want tomato seeds in their vegetable soup?! Not this little vegan.

I haven’t made this soup in, uh, over a year, I think. Why, I do not know, for it is delicious. Totally my kind of vegetable soup. I don’t believe in the bits-in-broth variety of soup of any sort. I might as well admit that I’m a fuss-pot about soup, too. For me, it must not be watery, but it must not be so chunky (ugh, I hate that word) that it could be classed as stew. Don’t get me wrong – I love a good stew! But don’t call it soup. If it has so many large, solid things in it that the toast has nothing to pick up / soak up, it ain’t soup. I like my soups smoooooth.

That being said, this soup is the best of both worlds in my book. It has some nice, pretty shredded vegetables and a thick, creamy, tasty base. Do try it. (A nod to Giorgio Locatelli for the inspiration – he even said the V word on his show! to paraphrase, his soup is vegan as long as you leave out the pancetta.)
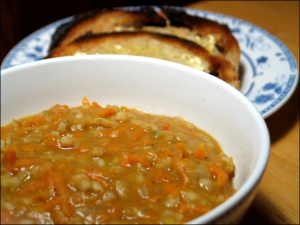
Creamy Bean & Vegetable Soup

Creamy Bean & Vegetable Soup

On the side… the easiest mini tofu quiches ever, made with grated zucchini. Yay. Mini Crustless Tofu Quiches. Wow, am I ever glad I kept my jumbo muffin tray. It’s just perfect for this recipe.
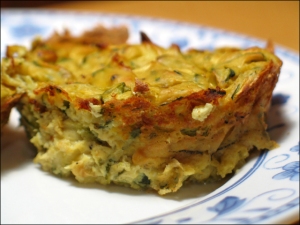
Mini Tofu Zucchini Quiche
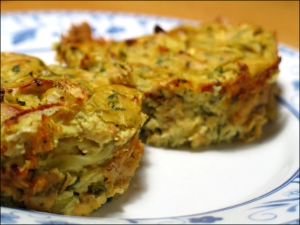
Mini Tofu Zucchini Quiche

Mini Tofu Zucchini Quiches

Mini Tofu Zucchini Quiches

Posted by: heliamphora | 10 April, 2009

You don’t have to knead me, baby.

O hai… it’s been a while.

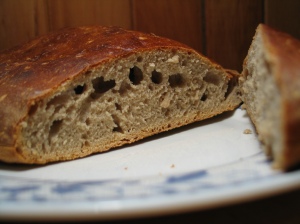
I’m going to kick off the proceedings with one of my new favourite foods: No-Knead Bread. It rocked my tastebuds’ socks, and completely surprised me with how it turned out, despite the disgusting appearance of the dough. I was so skeptical of its ‘rising’ progress that I let it develop for, uh *ahem* two days longer than the recipe suggested.

This was the best-textured, best-flavoured, least yeasty-smelling bread I’ve ever made, and perhaps even better than some breads I’ve bought. I loves me a good crust, one with a bit of crunch, and plenty of chew to provide a bit of jaw exercise.

Who’d have thought bread could be this good with only four ingredients and no arm-work? Well, I had held hopes for a simple, old-fashioned, sourdough-or-similar kinda recipe for some time. This recipe is a blessing for those of us without the skill or patience to make and keep a real sourdough starter.

No-Knead Bread

No-Knead Bread

Shall I post the recipe here? We-ell, I suppose I can, even though it’s a reiteration of a reiteration of a reiteration of a… you get the picture. The original is out there on the interwebs somewhere, but the recipe hasn’t changed much, anyway.

The way I made it is as follows.

Mix three cups flour (I used organic white stoneground wheat) in a large bowl with one and a half cups of water, one and a half teaspoons salt and a quarter teaspoon of active yeast granules. Cover the bowl with a damp cloth* and place it in a warm, draught-free place for 20 hours. Then stir it about a whole lot with a wooden spoon, ’cause it’ll be too soggy and sticky to handle. Put it back in the warm place. “Rinse and repeat”… for at least half a day, or up to two days(!). When you’ve given up hope that it will ever get airy, turn the oven on to HOT i.e. 220° C / 450° F and preheat a lightly oiled cast iron skillet in it. Tentatively poke and stir the dough some more, then when the oven is hot, take out the skillet and scrape in your sticky doughy mess. Bake for 30 minutes covered, then another 10-20 minutes uncovered, to brown the crust. Take it out of the oven, lift it out of the skillet with a spatula, put it on a plate, wait impatiently until it’s cool enough to handle, then cut off a slice and marvel at the miraculous texture**. Eat some and marvel at the delicious wheaty flavour. The end!

* I realised the necessity of this after leaving it uncovered for the first 20 hours, which left it with an unattractive dry layer on top.

** Note for next time: my bread could have had a better texture if I had followed the instructions for the second rising part – to put it in an oiled bowl or between flour-dusted cloths, so it’ll flop into the skillet relatively intact, instead of being stretched and stirred and mucked about.

Posted by: heliamphora | 3 September, 2008

…Because life is so uncertain.

Last Caturday I was so absorbed in chatting that I left it too late to make anything worth a damn for dinner. So I made dessert instead.

I was just dying to make my second batch of coconut custard. Oh, it’s so heavenly, you’ve no idea. People who think vegan food is deprivation? Try this. It does, however, rely on your being able to obtain vegan custard powder. Mine is Orgran. It makes me insanely happeh quite excited to use something that’s actually labelled with the V word!

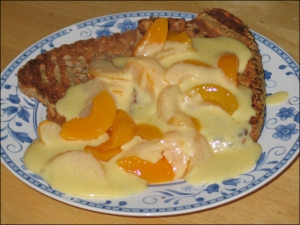
Having recently awoken my griller/sandwich-press from hibernation, and having run out of oil AND margarine for frying, I thought I’d try grilling my French toast. (In case you don’t know, vegan French toast is basically, er, pancake toast. You’ll see.) Bonus: it’s fat-free!! (Until you pour coconut custard over it. LOL.)

French Toast & Coconut Custard

French Toast & Coconut Custard

Vegan French Toast, and Coconut Custard

3-4 slices of bread, depending on size
half a cup of flour (I use barley)
a spoonful of sugar (or agave/maple syrup)
1 teaspoon baking powder
lots of cinnamon
a pinch of salt
1 ripe banana
soy milk (preferably vanilla)

Sift the dry ingredients into a bowl. Mash the banana and stir it into the dry ingredients along with enough soy milk to make a medium-thick pancake batter consistency. You want it to be able to soak into the bread without running off too much.

Preheat your grill to medium-low heat. Pour the mixture into a flat bowl/tray. Soak the bread in it for a few minutes either side, or until it’s all soaked up. Put the slices of bread onto the grill and close the press. Heat for a few minutes, then turn, and keep heating/turning until nice brown grill marks appear. Then remove toast from the gorilla griller.

3 tablespoons vegan custard powder
half a cup coconut cream / one cup coconut milk
water to make up to 500ml total liquid
sugar/agave to taste

Combine the coconut cream with the water. Warm a saucepan and briskly whisk together the custard powder, sweetener and liquid in it. Bring to a boil and reduce heat. Keep whisking/stirring until nicely thickened. Remove from heat.

To serve: Place the French toast on a pretty plate. Add some fresh/canned fruit if you so desire. Pour over as much custard as you want. Devour.

Posted by: heliamphora | 3 September, 2008

Of Grilled Tofu And Happiness.

I’m really beginning to like this stuff.

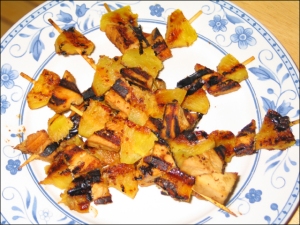
The pineapple started it!! I had a whole fresh ‘napple that needed to be used. I was lamenting in VW chat how I love the stuff, but hardly ever just sit and munch on it. So what could I do with it? Someone suggested grilling it. Funny how one doesn’t just think of such ideas, despite having included ‘napple on vege-kebabs in past barbecues. Anyway, I was intrigued… and my spoken ponder of quickly marinating some tofu (which I also happened to have) and skewering/searing the two together was met with many chatty cheers.

So I finally dragged out the grilling device. ‘Tis a grill-slash-sandwich-press… which means nice, easy grill lines on both sides at once. It’d been in storage since we moved last November. I can’t seem to find its drip tray, but vegan food doth not createth much icky drippy fatty stuff. Ha. I remember when I’d just gone vegan, I tried grilling tofu, and met with ambivalent results. I did not know diddly squat about how to flavour it back then. I have improoooved it.

Grilled Tofu & Pineapple

Grilled Tofu & Pineapple

half a pineapple
half a block of firm tofu
soy sauce
agave syrup
lemon juice
wholegrain mustard
grated ginger

kebab sticks

Whisk together the marinade ingredients.

Drain the tofu and, if you’re in a hurry like I was, press it as hard as you can without crushing it completely. If you have more time, press it over half an hour to an hour in the usual fashion. Cut it in half flatwise, then into squares or triangles as you like. Marinate for at least twenty minutes.

Turn on the grill to medium heat. Cut the skin and core off the pineapple, then slice it into pieces the same thickness as the tofu. Slide the pineapple and tofu onto skewers. Place the kebabs on the grill, and drizzle with any leftover marinade. Grill on both sides until nicely browned and those cool grill lines show up.

Devour.

Posted by: heliamphora | 20 August, 2008

Savour The Muffin…

…The savoury muffin!

I only recently realised that savoury muffins seem to be a southern hemisphere thing. At least, as far as I know, the Americans (i.e. the majority ^_^) on VegWeb have not heard of, or tried, savoury muffins. It’s a travesty!!

I used to love me a good spinach & feta, or cheese & herb, or sundried tomato & cream cheese, or whatever. I also adored me a good cheese scone – another thing unknown to my VW acquaintances. Their scones are all full of sweetness and light and berries and spices. But scones are another story.

I’ve been lovin’ the recipes I’ve tried for sweet vegan muffins. But sometimes one wants an alternative! So, thinking of the successes I’ve had with yumbly uncheese sauces based on nutritional yeast, I improvised a recipe for uncheese muffins. (I began with a recipe for cornbread muffins with vegan cheese, from this British food blog. After some experience making muffins, you get a feeling for what the batter should look/feel like… but it’s reassuring to start with basic quantities…)

Without further ado:

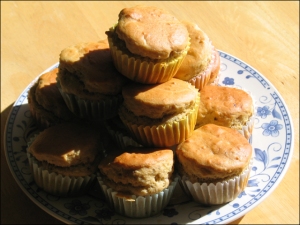
Uncheese, Herb & Onion Muffins

Uncheese, Herb & Onion Muffins

2 cups flour
1 cup fine cornmeal
1 teaspoon baking powder
½ teaspoon baking soda
1 teaspoon salt
½ teaspoon freshly ground pepper
½ teaspoon garlic powder
1½ teaspoons dried herbs
up to 1 tablespoon snipped fresh chives (optional)
2 cups unsweetened plant milk
2 teaspoons cider vinegar
½ cup nutritional yeast flakes
3 tablespoons vegetable oil
1 small onion

Preheat oven to 200° C. Line a muffin tray with paper cups.

Finely slice the onion and gently fry it in the oil, over medium heat, until golden brown. Add the nutritional yeast and stir, warming the yeast until it smells toasty (but be careful not to burn it). Pour in half a cup of the milk and stir until the yeast flakes are dissolved. Allow to cool.

Combine the remaining milk and the cider vinegar.

Combine the dry ingredients in a large bowl. Pour in the milk mixture and the onion mixture and stir with a wooden spoon until no large lumps remain. Spoon into the muffin cups and bake for 20-25 minutes, until a toothpick poked in the centre comes out clean.

—–

P.S. I would like to tweak and reattempt this, with more herbs, and mebbe some spinach. However, this version has already been tested by a newbie and approved. Sweeeet. (Er, saaaaavoury!)

Posted by: heliamphora | 9 August, 2008

One Potato, Two Potato, Three Potato, Four!

Firstly, let’s pretend that I’m posting this last Thursday, the 31st of July. 😉

Point 1. I love potatoes. Love love love them. Cannot quantify just how much I do.

Point 2. I never liked mayonnaise. Blerg. But I began to thoroughly enjoy alternative potato salads a couple of years ago, i.e. sour cream based ones. Then, precisely one year ago(!), I went vegan.

I thought my veganniversary might be a good occasion to celebrate me, and my friend the humble spud, by inventing a vegan potato salad. Without, of course, using vegannaise/nayonnaise, which I am not enamoured of trying… especially at the prices they charge for the stuff.

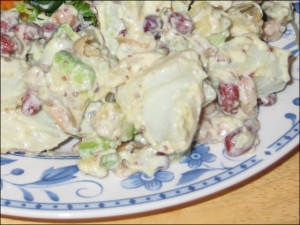
Not sure why I elected to try tahini in the dressing – after all, I’ve noticed that it can make a dish bitter if used incorrectly. ‘Should be safe enough,’ I thought, ‘with some sweetener…’ and so I blended it with agave syrup for sweet, wholegrain mustard for tang, and lemon juice for tartness. Delicious wackiness ensued!

Tahini Potato Salad

Tahini Potato Salad

Tahini Potato Salad

Note: I neglected to write down the exact quantities at the time, so the following are guesstimations.

3 tablespoons tahini
2 tablespoons agave syrup
2 teaspoons wholegrain mustard
juice of 2-3 lemons
4-5 large-medium potatoes
400g can four-bean mix, or chickpeas
1 large firm, ripe avocado
salt & pepper to taste

Gently boil the potatoes in salted water until tender. Drain and rinse in cold water to take the heat off.

Whisk together the tahini, agave, mustard and lemon juice to make the dressing. If it is still too thick, add more lemon juice, or a little water. (Aim for the consistency of… er… sour cream or mayo. ^_^)

Rinse and drain the beans. Dice the avocado. Cut the potatoes into quarters or eighths, depending on size. Mix gently with the dressing so as not to break up the potatoes too much.

Season to taste, and serve.

Posted by: heliamphora | 9 August, 2008

He put Basil in the ratatouille?!

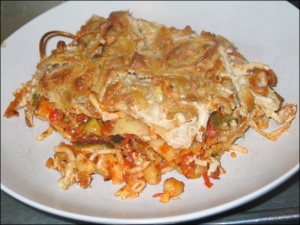
Whenever I think of ratatouille I’m reminded of a certain episode of Fawlty Towers, featuring Basil the Rat. 😀 Now, I must start by saying that ratatouille is something I never thought I would like. But with the curious, experimental instinct that seems to come naturally with veg*nism, I figured out a way to personalise it. No nasty-tasting aubergine for me!! And I’ll waste time getting the scratchy skins off my peppers if I wanna!! Heh, heh.

I veganised and personalised this recipe from an old vegetarian British cookbook written many decades ago. Can’t quite remember its name right now. But dis resipeh iz mien nao anyweh. Due to the nature of the sauce, this is best eaten on the day it’s made. Try to keep it for an occasion when you can share. Although it freezes well enough, as long as you seal it up to prevent freezer-burn.

Ratatouille Lasagna

Ratatouille Lasagna

Ratatouille Lasagna

6 instant lasagna sheets
2-3 tablespoons vegetable oil
2 onions
2 cloves garlic
6-7 zucchini
2 large peppers
2 400g cans chopped tomatoes
2 tablespoons tomato paste
1 teaspoon dried basil
½ packet pasta shapes

Sauce:
½ cup raw cashews
2 tablespoons flour
1 cup rice milk
½ teaspoon nutmeg
½ teaspoon freshly ground pepper
2 tablespoons vegetable oil
¼ cup nutritional yeast

Bake the peppers whole until soft, allow to cool, then remove and discard the skins, seeds and membranes. Dice the onion as finely as humanly possible. Peel and grate the garlic. Cut the zucchini into quarters lengthways then 5mm slices.

Heat the oil and fry the onion over low heat until very soft. Add the garlic and fry for a minute. Add the zucchini and diced peppers, and gently fry until softened. Pour in the tomatoes, add the tomato paste and basil. Season to taste and simmer until reduced.

In a food processor, blend the cashews, rice milk and flour until smooth. Warm the oil in a small pot and sprinkle in the nutritional yeast. When it smells nice and toasty, whisk in the liquid and spices. Stir sauce until thickened, adding some water if necessary.

Cook the pasta shapes in plenty of salted water until tender, then drain.

Preheat the oven to 200° C. Spread half of the pasta shapes over the base of a large rectangular baking dish. Spread quarter of the ratatouille over the pasta. Place a layer of lasagne sheets, another quarter of the ratatouille, and half of the sauce. Place lasagne sheets, ratatouille, lasagne sheets, ratatouille and the other half of the sauce mixed with the rest of the pasta shapes on top.

Bake for 30 minutes, then poke with a skewer to check if the lasagne sheets are tender. Remove from the oven, cool for at least ten minutes, and serve.

Posted by: heliamphora | 9 August, 2008

Couscouscouscouscous…..

Many months can fly by before I remember to revisit a dependable, old favourite recipe. Can’t honestly say how long it’s been since I made my couscous salad. Pssst – I even designed this one myself! No adapations or veganisations necessary. Well, perhaps a little of the latter, but only because I made up this dish while I was vegetarian and therefore still ate butter. But I’ve figured out something better.

I do believe the best recipes are simply a case of figuring out a few flavours that like each other, and getting them together. One of my favourite fresh herbs is marjoram, the milder, sweeter cousin of oregano. This salad is good enough without it, when one doesn’t have it, but divine when one does.

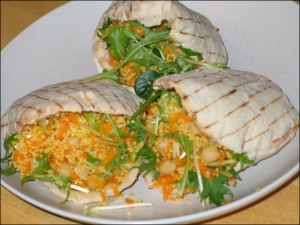
Couscous Salad in Pita

Couscous Salad in Pita

Anna’s Couscous Salad

1 cup couscous
1 teaspoon vegetable oil or margarine
salt to taste
a few sprigs of fresh marjoram
2 carrots
1 teaspoon ground coriander
½ teaspoon powdered ginger
400g can chickpeas
a handful of snow pea shoots or pods
200g baby salad greens
small to medium sized pita breads
tahini
agave syrup
wholegrain mustard

Prepare couscous according to packet instructions and transfer it to a large mixing bowl. Add a spoonful of oil or margarine and salt to taste. While it’s still warm, stir in some roughly chopped marjoram leaves. Rinse and drain the chickpeas and stir them in.

Coarsely grate the carrot. Gently stir-fry in a little oil with the coriander and ginger, until just tender. Add to the couscous and chickpeas, and stir a few times to cool.

Chop the snow peas into strips and mix them and the greens with the couscous mixture.

Per person, lightly toast two pitas, split them halfway open and spread them with a mixture of one tablespoon tahini, one tablespoon agave and a teaspoon of mustard. Fill pitas with salad, and munch.

Posted by: heliamphora | 27 July, 2008

Pancakes!

I came home from work on Friday an hour late and exhausted in every way, and had myself a little cry. A sniffle had turned into a foul-tasting cold, and I’d run out of creativity long before I started work this morning. I wanted something nice for dinner but had no energy for cooking. So I concentrated my efforts on other kinds of food over the rest of the weekend.

Since I had no breadythings for Saturday’s breaky, I decided to try pancakes, after a long time without. I never was an expert at them, and sometimes my tummy complains. But I’ve done pretty well – not one, but two breakfasts of pancakes, and no major indigestion. Following my aim to avoid wheat when possible, I’ve been improvising recipes for barley pancakes. Here’s what I came up with.

Barley Pancakes version one

Barley Pancakes version one

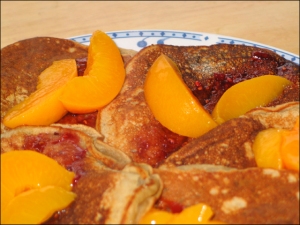
Barley Banana Pancakes & Peaches

1 cup barley flour
1 teaspoon baking powder
up to 1 teaspoon cinnamon
¼ cup raw sugar
¼ teaspoon salt
soy/rice milk
1 ripe banana
½ teaspoon vanilla extract
margarine
raspberry jam
½ a 400g can of peach slices in juice

Warm a frying pan over medium-low heat. Sift the dry ingredients. Mash the banana, then stir in the other wet ingredients, using just enough rice/soy milk to reach your desired consistency. Combine wet and dry.

Grease the pan with a little margarine, and pour in about a third to a half cup of batter (I got four large pancakes out of the mixture). Turn the pancake when bubbles have formed and popped. Cook for another half a minute or so, then flip out onto a warm plate. Cook the remaining batter in the same way.

Serve the pancakes, with a stripe of raspberry jam on each, and a few peach slices.

Barley Pancakes, version two

Barley Pancakes, version two

Barley Berry Pancakes & Bananas

1 cup barley flour
1 teaspoon baking powder
up to 1 teaspoon cinnamon
¼ cup raw sugar
¼ teaspoon salt
soy/rice milk
½ teaspoon vanilla extract
replacement for one egg (I use Orgran)
½ cup thawed frozen raspberries
margarine
2 firm, ripe bananas
soy yoghurt with fruit

Warm a frying pan over medium-low heat. Sift the dry ingredients. Prepare the egg replacer, then stir in the other wet ingredients, using just enough rice.soy milk to reach your desired consistency. Combine wet and dry.

Grease the pan with a little margarine, and pour in about a third to a half cup of batter (I got four large pancakes out of the mixture). Turn the pancake when bubbles have formed and popped. Cook for another half a minute or so, then flip out onto a warm plate. Cook the remaining batter in the same way.

Peel, and slice the bananas in half lengthways. Lightly grease the pan again and fry the bananas until golden brown. Serve on top of the pancakes, with a few spoonfuls of yoghurt, and a sprinkling of cinnamon if desired.

Posted by: heliamphora | 26 July, 2008

First Things First?

Hello, blog. Nice to meet you. I want to show the world all my vegan cooking experiments, and I want you to help me. That is all. 🙂

*ahem* Actually, that wasn’t all. I don’t know how best to bring you up to date on all the documented dishes I’ve already made. Perhaps the simplest way – at least for now – is to point you in the direction of my photo albums on Facebook, and my recipes on VegWeb. Yeah, I could dig up the past, but I figure: if my recipes prove worth keeping, I’ll make them again. And then you’ll see them here!

Of course, I don’t want to continue without first thanking VegWeb as my primary source of vegan culinary inspiration. Love you, VW Peeps. ;D

Categories